Book Errata
SolidWorks 2015 Part I - Basic Tools
Parts, Assemblies and Drawings
- View Errata
- Submit Errata
Errata
- Chapter 1 Page 4
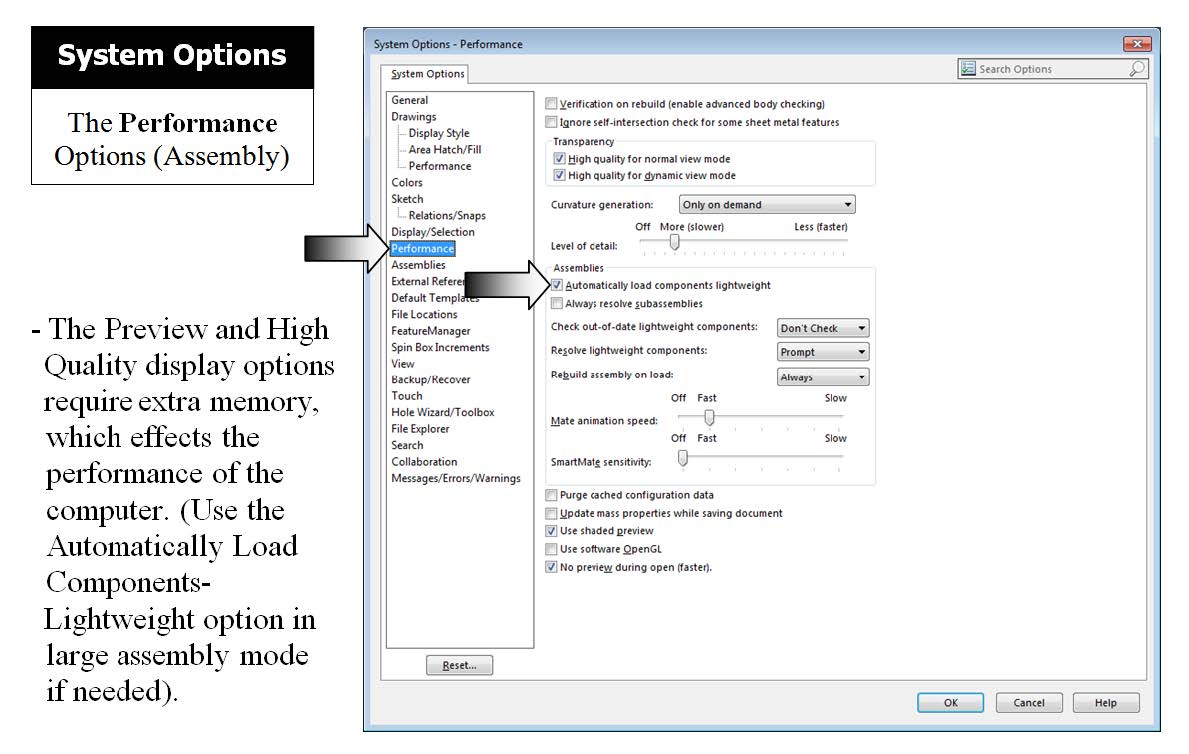
The description next to the image on the top of the page should direct users to see page 1-6 for instructions on how to select the Lightweight options.
- Chapter 1 Page 6
A step has been added to clarify the steps needed to select the Lightweight option.

- Chapter 1 Page 7
The description next to the top image should direct readers to see the bottom image on the previous page (1-6) on how to select the Lightweight option.
- Chapter 1 Page 14
Question 8 should be ignored as it is no longer relevant for SOLIDWORKS 2015.
- Chapter 4 Page 3
Step 1 of the last statement says to add relations as shown but none are shown. The relation is supposed to be EQUAL between the 2 circles.
- Chapter 4 Page 8
Step 8. The direction for the fillet is .032 for the radius but the callout box pointing to the edge on the diagram reads .0325. The correct dimension is .032, the text is correct, the image is not.
- Chapter 4 Page 9
Step 9. The dimension .032 as indicated in the text is correct.
- Chapter 4 Page 11
Step 13. The dimension .032 as indicated in the text is correct.
- Chapter 4 Page 13
Step 17. The dimension .032 as indicated in the text is correct.
- Chapter 7 Page 27
Step 5: The centerline of the c'bore hole should be on the axis of the side tab.
- Chapter 9 Page 19
There should be no fillets on the edges of the holes.
- Chapter 18 Page 1

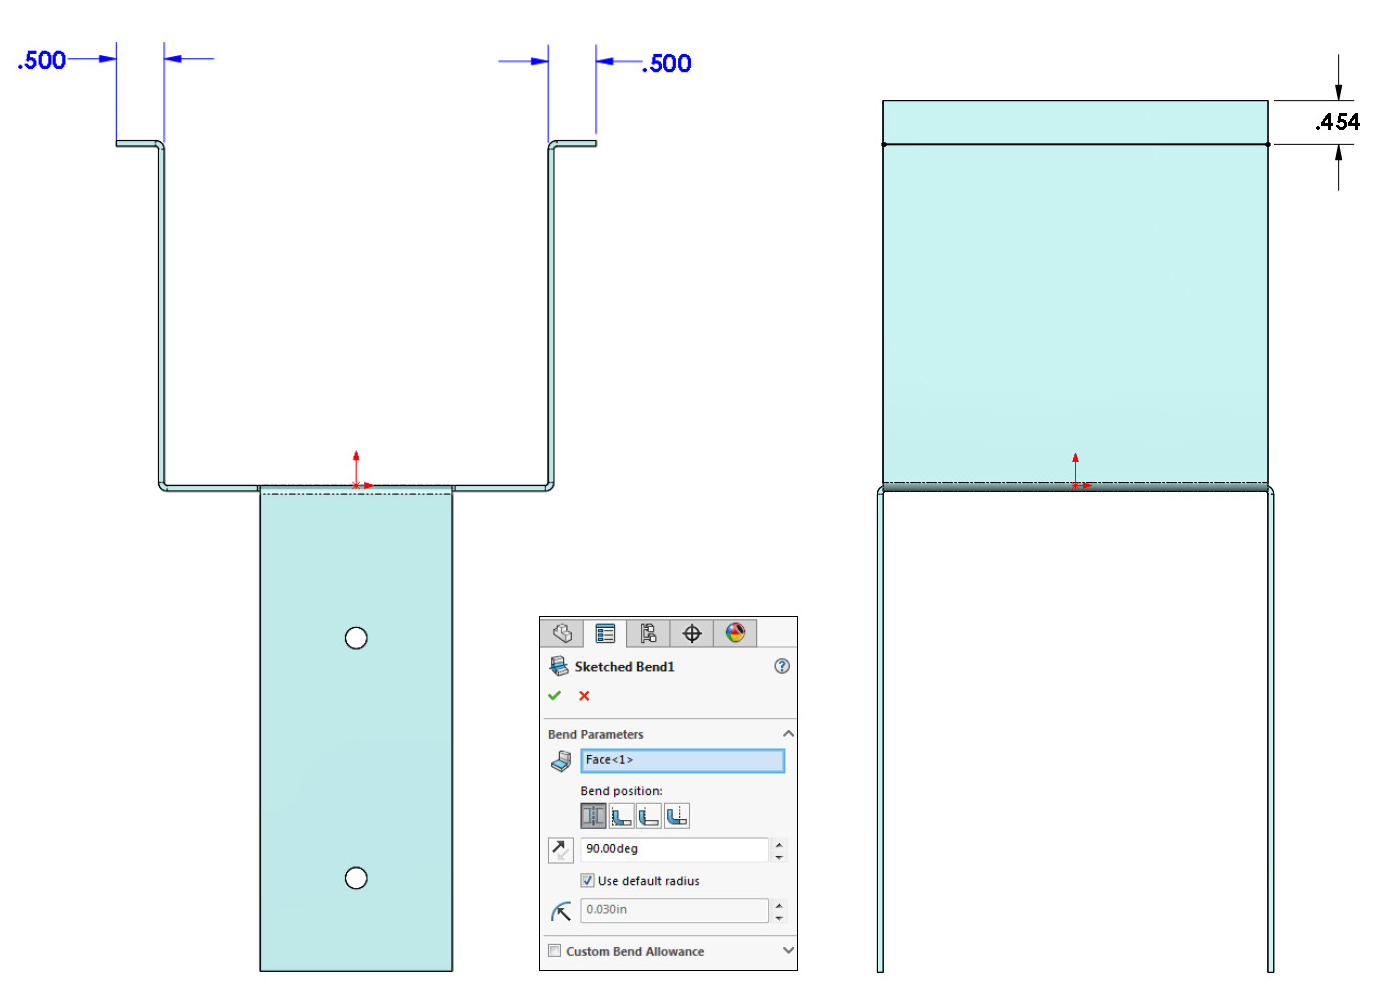
The intent is to keep the flange length at .500” measured from the inside face (left image). The sketch line should be changed to .454” if the option Bend Centerline is used (right image). The model shows the correct dimensions but the drawing, for some reason, does not.
Submit Errata
Your information will remain private. We will only use your information if we need to contact you for further details regarding the correction you submit.
